跳到主要内容

Nginx as HTTPS Proxy for HTTP and TCP Backend Services

· 阅读需 4 分钟

Overview​

We’ll configure NGINX to act as an HTTPS proxy in front of the following backend services:

  • Kafka Cluster (TCP-based)
  • Elasticsearch Cluster (HTTP-based)
  • Avro Schema Registry (HTTP-based)
  • MinIO Cluster (HTTP-based)

NGINX will be set up to:

  1. Route requests to different backend services based on ports.
  2. Securely serve HTTPS traffic.
  3. Enable and configure the required NGINX modules for HTTP and TCP traffic management.

Prerequisites​

NGINX Installation with Required Modules​

Ensure that NGINX is installed with both the HTTP and Stream modules enabled:

  • HTTP Module (ngx_http_module): Enabled by default and necessary for HTTP-based services.
  • Stream Module (ngx_stream_module): Required for TCP-based services, like Kafka.

Verifying Installed Modules​

Run the following command to check if these modules are enabled:

nginx -V 2>&1 | grep -o 'with-http\|with-stream'

If --with-stream is missing, install NGINX with the Stream module. On most Linux distributions, the full version of NGINX (nginx-full or nginx-extras) will include the Stream module:

# On Ubuntu/Debian
sudo apt-get install nginx-full

# On CentOS/RHEL
sudo yum install nginx

To verify that both modules are available:

nginx -V 2>&1 | grep -o 'with-http\|with-stream'

You should see both with-http and with-stream in the output.


NGINX Configuration​

This configuration assumes that we’re using separate ports to route traffic to each backend service through NGINX.

Step 1: General NGINX HTTPS Configuration​

Set up SSL/TLS to handle HTTPS traffic. Here’s an example configuration with SSL settings:

http {
# Define SSL settings for all services
server {
listen 443 ssl;
server_name your-nginx-domain.com;

ssl_certificate /path/to/your_certificate.crt;
ssl_certificate_key /path/to/your_private_key.key;

# TLS configuration for security
ssl_protocols TLSv1.2 TLSv1.3;
ssl_ciphers 'ECDHE-ECDSA-AES256-GCM-SHA384:ECDHE-RSA-AES256-GCM-SHA384';
ssl_prefer_server_ciphers on;

# Redirect based on port to respective services
location /elasticsearch/ {
proxy_pass http://elasticsearch_cluster/;
}

location /schema-registry/ {
proxy_pass http://schema_registry/;
}

location /minio/ {
proxy_pass http://minio_cluster/;
}
}
}

Step 2: Configure Each Backend Service​

HTTP-based Services (Elasticsearch, Avro Schema Registry, MinIO)​

  1. Elasticsearch (port 9200):
    • Direct HTTP requests to the Elasticsearch cluster.
  2. Avro Schema Registry (port 8081):
    • Redirect requests on /schema-registry to Avro Schema Registry.
  3. MinIO (port 9000):
    • Redirect MinIO requests for storage management.
http {
upstream elasticsearch_cluster {
server es1:9200;
server es2:9200;
}

upstream schema_registry {
server schema-registry1:8081;
}

upstream minio_cluster {
server minio1:9000;
}

server {
listen 443 ssl;
server_name your-nginx-domain.com;

ssl_certificate /path/to/your_certificate.crt;
ssl_certificate_key /path/to/your_private_key.key;

location /elasticsearch/ {
proxy_pass http://elasticsearch_cluster;
}

location /schema-registry/ {
proxy_pass http://schema_registry;
}

location /minio/ {
proxy_pass http://minio_cluster;
}
}
}

TCP-based Service (Kafka)​

  1. Kafka will require a separate configuration block under stream to handle TCP-based traffic on port 9092.
# Stream block for TCP traffic
stream {
# Kafka upstream cluster
upstream kafka_cluster {
server kafka1:9092;
server kafka2:9092;
}

# TCP Proxy for Kafka
server {
listen 9092;
proxy_pass kafka_cluster;

# Logging (optional for debugging)
access_log /var/log/nginx/kafka_access.log;
error_log /var/log/nginx/kafka_error.log;
}
}

Step 3: Complete Configuration Example​

worker_processes auto;

events {
worker_connections 1024;
}

http {
# HTTP services upstreams
upstream elasticsearch_cluster {
server es1:9200;
server es2:9200;
}

upstream schema_registry {
server schema-registry1:8081;
}

upstream minio_cluster {
server minio1:9000;
}

# SSL and HTTP proxy configurations
server {
listen 443 ssl;
server_name your-nginx-domain.com;

ssl_certificate /path/to/your_certificate.crt;
ssl_certificate_key /path/to/your_private_key.key;
ssl_protocols TLSv1.2 TLSv1.3;
ssl_ciphers 'ECDHE-ECDSA-AES256-GCM-SHA384:ECDHE-RSA-AES256-GCM-SHA384';
ssl_prefer_server_ciphers on;

location /elasticsearch/ {
proxy_pass http://elasticsearch_cluster;
}

location /schema-registry/ {
proxy_pass http://schema_registry;
}

location /minio/ {
proxy_pass http://minio_cluster;
}
}
}

# Stream block for TCP traffic to Kafka
stream {
upstream kafka_cluster {
server kafka1:9092;
server kafka2:9092;
}

server {
listen 9092;
proxy_pass kafka_cluster;

access_log /var/log/nginx/kafka_access.log;
error_log /var/log/nginx/kafka_error.log;
}
}

Verifying the Configuration​

  1. Test Configuration Syntax: Ensure there are no syntax errors in the configuration file.
    sudo nginx -t
  2. Reload NGINX: Apply changes.
    sudo systemctl reload nginx
  3. Confirm Stream Module Availability:
    nginx -V 2>&1 | grep -- 'with-stream'
  4. Check Connection to Services: Using curl for HTTP services or Kafka client tools, verify that requests are correctly routed.

This setup provides a secure, flexible solution to route requests to both HTTP and TCP-based backend services via NGINX, using HTTPS for secure communications and the necessary modules for protocol compatibility.
One Real Production Issue Fix About Race Condition in Adobe LiveCycle

· 阅读需 5 分钟

1. Introduction​

In software development, race conditions can lead to unpredictable behavior, particularly in multi-threaded environments. This article explores race conditions, particularly in the context of using the Apache Velocity templating engine, and provides insights into avoiding such issues in production systems.

2. Real-Life Production Issue​

During my time at a major telecommunications company, I was involved in a project that utilized Apache Velocity within Adobe LiveCycle to generate PDFs from templates. Although PDF generation had been functioning smoothly, we encountered a serious issue in the production environment where, on certain days each month, PDF generation would intermittently result in NullPointerExceptions (NPEs).

The production environment was more robust than development and UAT, resulting in higher concurrency levels. The frequent NPEs led to the application needing to be rebooted to restore functionality. Initial investigations did not yield immediate clues, as the errors stemmed deep within the Adobe LiveCycle source code, obscuring the connection to Apache Velocity.

Despite increasing system resources and tuning the template generator's maximum thread limit, the issue persisted and even worsened. After extensive debugging, including analyzing process dumps during PDF rendering and testing various concurrency scenarios, I identified that the root cause was tied to the VelocityEngine. This engine was being instantiated for every template rendering request, leading to Race Conditions due to concurrent access.

3. What is a Race Condition?​

A race condition occurs when multiple threads or processes attempt to change shared data at the same time. This can lead to inconsistent results, unexpected behavior, or application crashes, particularly when the sequence of thread execution is not managed correctly.

Example:​

Imagine two threads updating the same bank account balance simultaneously. If both threads read the current balance before either has written back the new balance, one thread's update could overwrite the other, leading to a final balance that doesn't reflect both transactions.

4. How Race Conditions Occur in Apache Velocity​

In the case of Apache Velocity, the VelocityEngine is not thread-safe by default. If multiple threads instantiate and manipulate the same VelocityEngine instance concurrently, it can lead to race conditions and unpredictable behaviors, such as NullPointerExceptions. This is particularly critical in a high-throughput environment, such as the one experienced in the production instance at Rogers.

Key Factors:​

  • Multiple Concurrent Requests: In high-concurrency scenarios, simultaneous requests can create contention for resources managed by shared instances.
  • Stateful Objects: Objects like VelocityEngine that maintain state can exhibit unexpected behaviors when accessed by multiple threads.

5. Example Scenario​

In our case, PDF generation would involve creating a VelocityEngine instance for each template rendering request. The absence of synchronization or proper handling of concurrent requests led to conditions where one thread's updates conflicted with another's, causing NPEs during PDF rendering.

Code Example:​

Here’s a simplified representation of how VelocityEngine was used improperly:

import org.apache.velocity.app.VelocityEngine;

public class PdfGenerator {

public void generatePdf(String template, Map<String, Object> context) {
VelocityEngine engine = new VelocityEngine();
engine.init();
Template tpl = engine.getTemplate(template);

// Merging context with template
StringWriter writer = new StringWriter();
tpl.merge(new VelocityContext(context), writer);

// Further PDF generation logic...
}
}

In this example, every call to generatePdf creates a new instance of VelocityEngine, leading to potential race conditions.

6. Solutions to Race Conditions​

To mitigate race conditions in Apache Velocity, several approaches can be employed:

1. Use a Thread-Safe Velocity Engine​

Utilize a single shared instance of VelocityEngine, initialized once and reused across multiple requests.

2. Synchronization​

Wrap access to the VelocityEngine in synchronized blocks to ensure that only one thread can access it at a time.

3. Connection Pooling​

Implement connection pooling for managing VelocityEngine instances, allowing for better resource management and concurrency handling.

4. Lightweight Objects​

If possible, use lighter objects that do not maintain state or can be safely reused.

7. Sample Code and Configuration​

Here’s an improved approach using a singleton VelocityEngine instance:

import org.apache.velocity.app.VelocityEngine;
import org.apache.velocity.runtime.resource.ResourceManager;
import org.apache.velocity.runtime.resource.Resource;

public class PdfGenerator {

private static final VelocityEngine engine = new VelocityEngine();

static {
engine.init();
}

public void generatePdf(String template, Map<String, Object> context) {
Template tpl = engine.getTemplate(template);

// Merging context with template
StringWriter writer = new StringWriter();
tpl.merge(new VelocityContext(context), writer);

// Further PDF generation logic...
}
}

Configuration Example:​

To ensure that the VelocityEngine is properly configured, the following configuration might be included:

# velocity.properties
resource.loader = file
file.resource.loader.path = /path/to/templates

Verifying the Configuration​

To check if the VelocityEngine is initialized properly and functioning as expected:

  • Logging: Enable logging within the Velocity framework to capture initialization events and errors.
  • Unit Tests: Implement unit tests that trigger concurrent PDF generation requests and verify output consistency.

8. Conclusion​

Race conditions in multi-threaded environments, especially when using libraries like Apache Velocity, can lead to severe application issues. Understanding how these conditions arise and employing strategies to mitigate them is crucial for building robust systems. By adopting best practices, such as using a singleton VelocityEngine, synchronizing access, and implementing pooling strategies, developers can significantly reduce the likelihood of encountering race conditions, ensuring smooth operation even under high-load scenarios.

Race Conditions in Apache Velocity

· 阅读需 5 分钟

1. Introduction to Race Conditions​

A race condition occurs in a concurrent system when two or more threads access shared data and try to change it simultaneously. The final outcome depends on the timing of how the threads are scheduled, leading to unpredictable behavior. This can result in inconsistent data states, application crashes, or even security vulnerabilities.

Key Characteristics of Race Conditions:​

  • Concurrent Execution: More than one thread accesses shared resources simultaneously.
  • Timing Dependency: The result depends on the order and timing of execution.
  • Non-Deterministic Behavior: The outcome is not predictable.

2. Understanding Apache Velocity and VelocityEngine​

Apache Velocity is a Java-based template engine that allows developers to create dynamic web pages by combining templates with data sources. It uses the VelocityEngine class to manage the rendering of templates.

VelocityEngine​

  • It is responsible for loading templates and rendering them.
  • Creating a VelocityEngine instance is resource-intensive, which makes it inefficient to instantiate it multiple times per request.
  • In older versions like 1.7, reusing a single VelocityEngine instance can lead to thread safety issues, including race conditions.

3. Race Condition Explained​

When multiple threads share the same instance of VelocityEngine, they might access or modify the state of the engine at the same time. If the engine’s internal state is not properly synchronized, this can lead to unexpected behaviors, such as:

  • Incorrect Template Rendering: Two threads might try to modify the same template context.
  • Inconsistent Data Output: The output can vary based on the order of execution.
  • Application Crashes: If an unexpected state is encountered, it might lead to exceptions.

Example:​

Imagine a web application where multiple users trigger requests to generate reports using the same VelocityEngine. If one thread updates the template context while another thread is rendering a report, it may lead to incomplete or corrupted outputs.

4. Real-Life Scenario with Apache Velocity​

Consider a web application that generates user-specific reports based on data fetched from a database. This application utilizes Apache Velocity to format the reports. If the application is under heavy load, multiple requests for report generation may come in simultaneously.

Example Scenario:​

  1. User A requests a report for their account.
  2. User B requests a report for their account almost simultaneously.
  3. The application uses a shared VelocityEngine instance.
  4. Both requests modify the shared state of the VelocityEngine, leading to inconsistencies in the generated reports.

5. Sample Code Demonstrating the Issue​

Here's an example demonstrating how a race condition can occur with VelocityEngine.

import org.apache.velocity.app.VelocityEngine;
import org.apache.velocity.Template;
import org.apache.velocity.VelocityContext;

public class ReportGenerator {
private static final VelocityEngine velocityEngine = new VelocityEngine();

public String generateReport(String userName, String reportData) {
// Creating a new context for each request
VelocityContext context = new VelocityContext();
context.put("userName", userName);
context.put("reportData", reportData);

// Load the template
Template template = velocityEngine.getTemplate("reportTemplate.vm");

// Render the template
StringWriter writer = new StringWriter();
template.merge(context, writer);
return writer.toString();
}
}

Explanation:​

In the above code, multiple threads may call generateReport simultaneously. If the VelocityEngine instance has mutable state that is not synchronized, it could lead to inconsistent outputs.

6. Solutions to Avoid Race Conditions​

To prevent race conditions when using VelocityEngine, consider the following strategies:

1. Thread-Safe VelocityEngine Initialization​

  • Ensure that VelocityEngine is initialized only once in a thread-safe manner. Use a singleton pattern or dependency injection frameworks (e.g., Spring) to manage the lifecycle.
import org.apache.velocity.app.VelocityEngine;

public class VelocityEngineProvider {
private static final VelocityEngine instance = new VelocityEngine();

private VelocityEngineProvider() {}

public static VelocityEngine getInstance() {
return instance;
}
}

2. Create a Separate Context per Request​

  • Always create a new VelocityContext for each request. This ensures that each thread works with its own context and avoids shared mutable state.

3. Synchronization Mechanisms​

  • Use synchronization mechanisms like synchronized blocks or ReentrantLock if shared state modifications are necessary. However, this may impact performance.

4. Upgrade to Latest Versions​

  • Upgrade to newer versions of Apache Velocity that may have addressed these concurrency issues. Newer versions might provide better handling of thread safety.

Example of Safe Usage​

Here’s a revised example that incorporates the aforementioned solutions:

import org.apache.velocity.app.VelocityEngine;
import org.apache.velocity.Template;
import org.apache.velocity.VelocityContext;

public class ReportGenerator {
private static final VelocityEngine velocityEngine = VelocityEngineProvider.getInstance();

public String generateReport(String userName, String reportData) {
VelocityContext context = new VelocityContext();
context.put("userName", userName);
context.put("reportData", reportData);

// Load the template in a thread-safe manner
Template template = velocityEngine.getTemplate("reportTemplate.vm");

StringWriter writer = new StringWriter();
template.merge(context, writer);
return writer.toString();
}
}

7. Conclusion​

Race conditions pose a significant risk in multi-threaded environments, especially when dealing with shared resources like VelocityEngine. By understanding the nature of race conditions, applying proper design patterns, and ensuring thread safety, developers can create robust and reliable applications using Apache Velocity. Always keep your libraries up-to-date to benefit from the latest improvements and security patches.

The SOLID Principles in Software Design and Development

· 阅读需 7 分钟

Introduction​

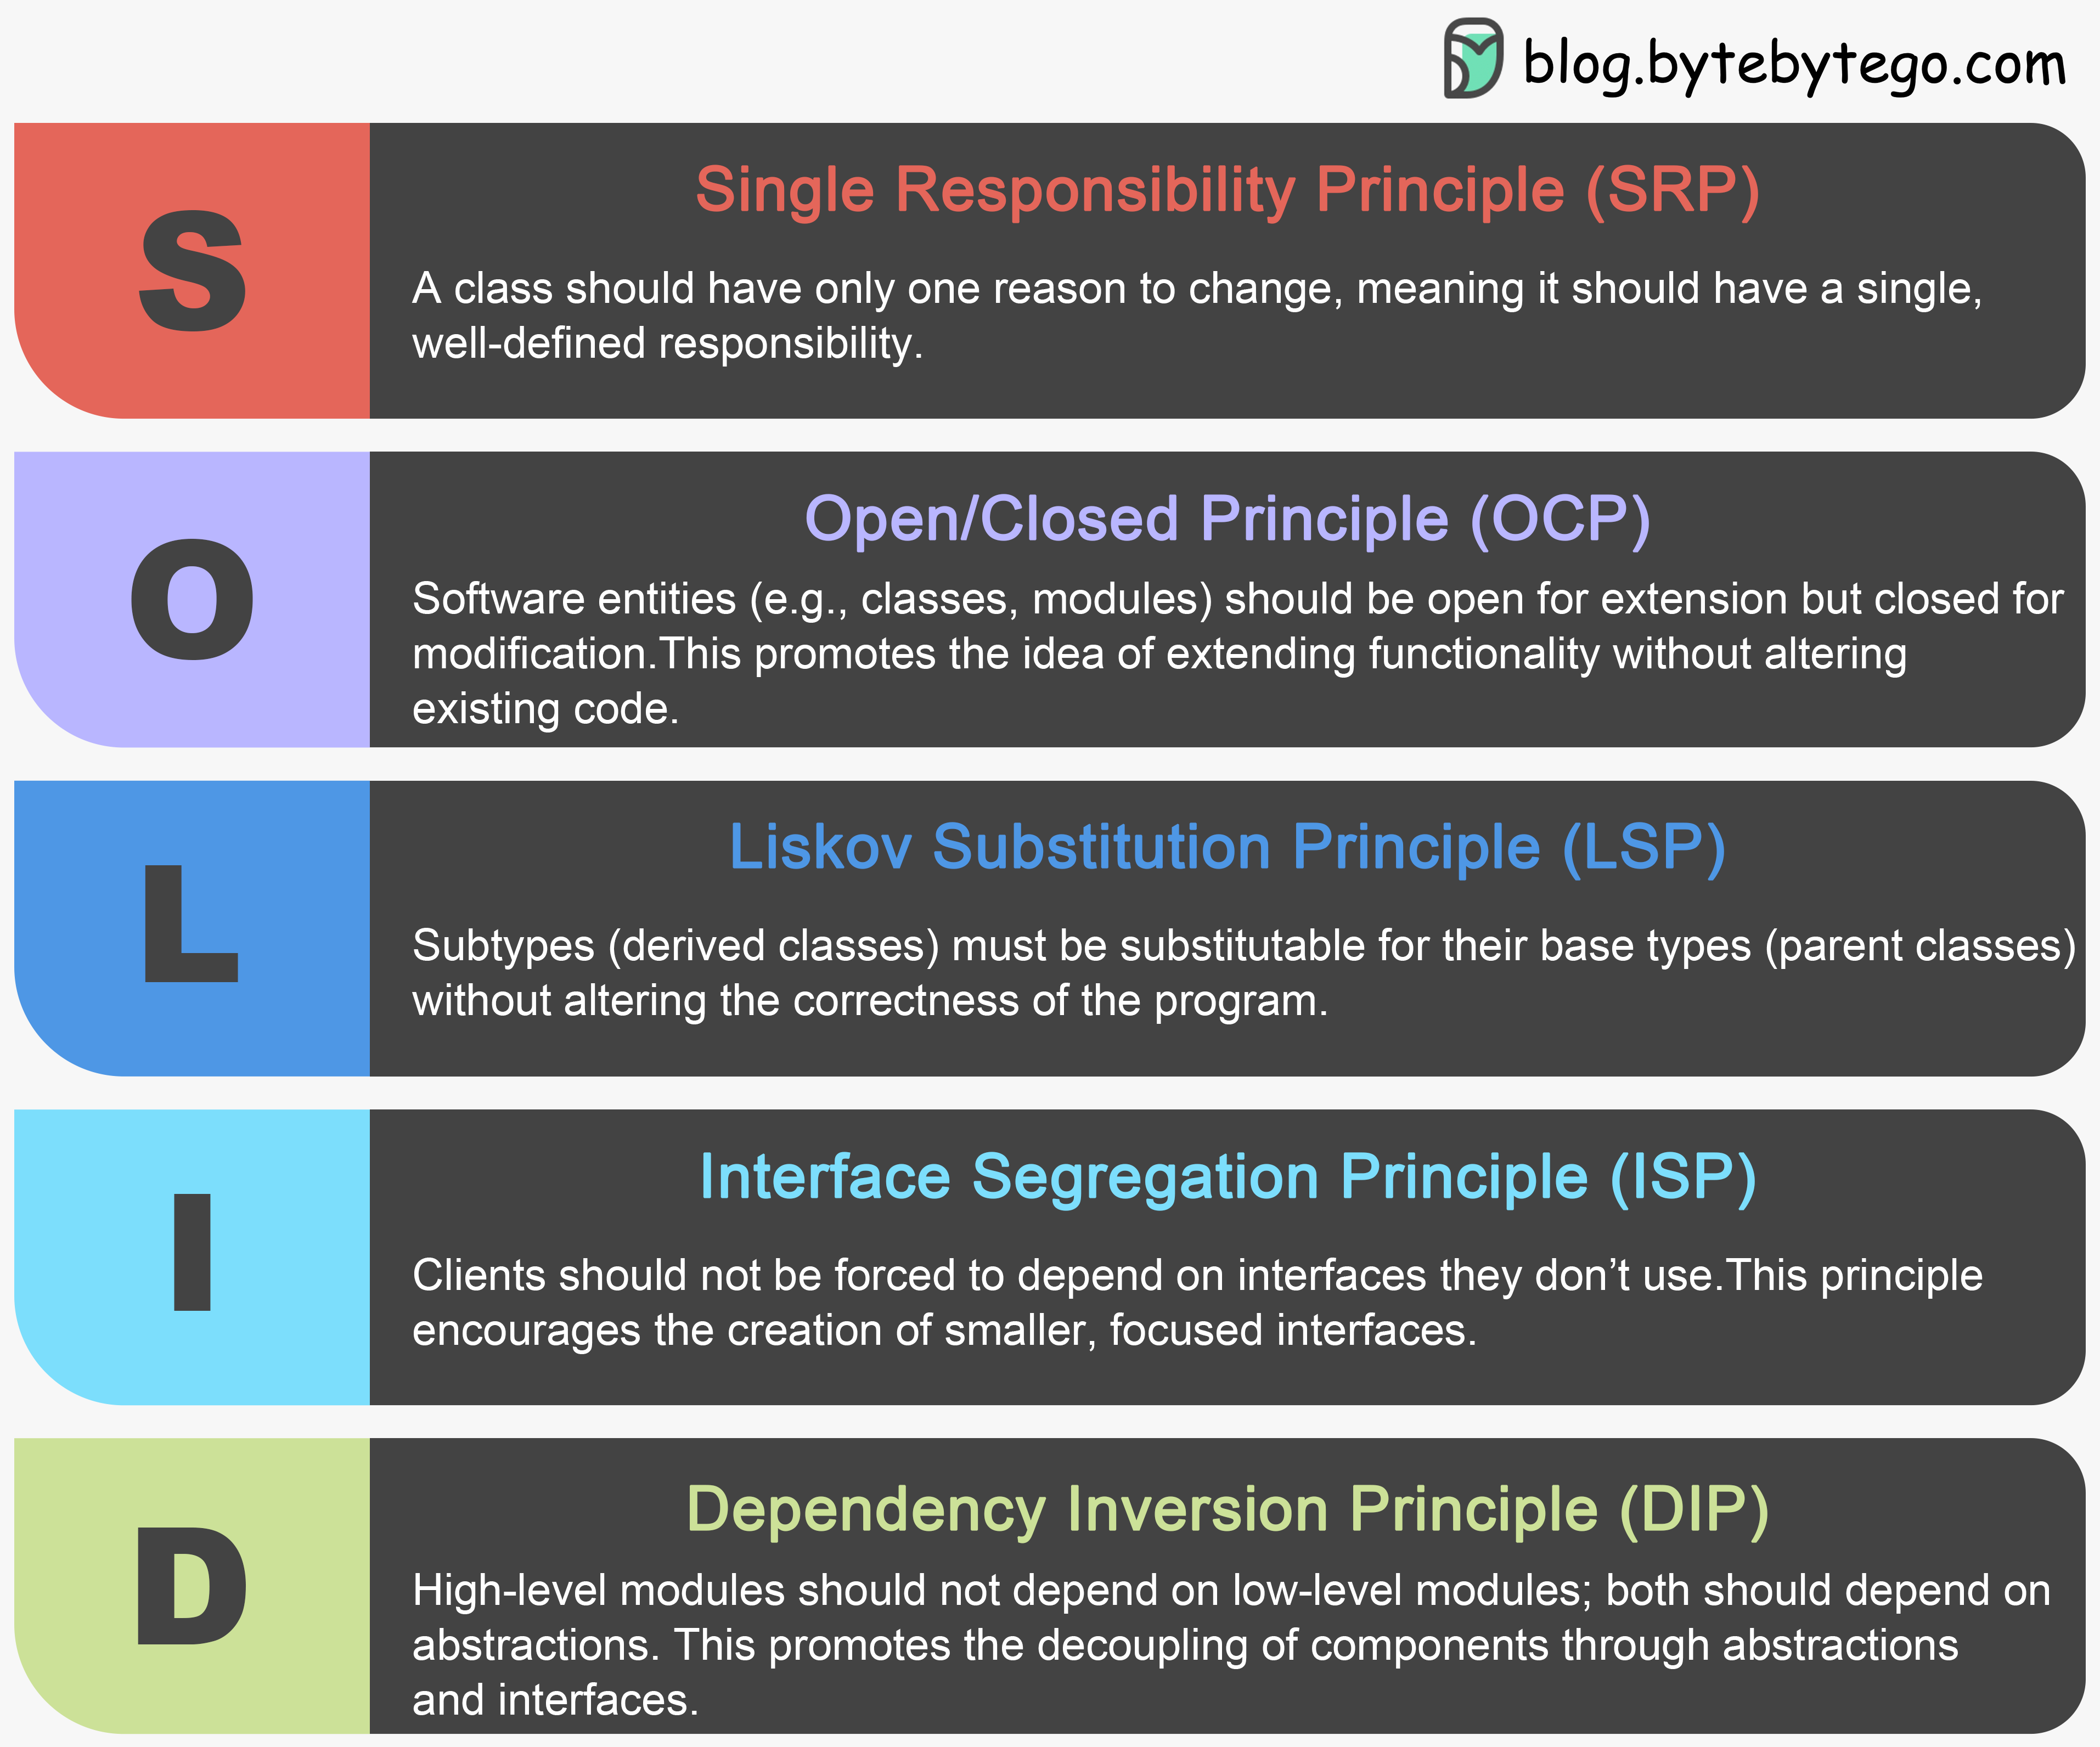
The SOLID principles are a set of five design principles intended to make software designs more understandable, flexible, and maintainable. These principles were introduced by Robert C. Martin (also known as Uncle Bob) and are widely accepted in the software development community. The acronym SOLID stands for:

  • Single Responsibility Principle (SRP)
  • Open/Closed Principle (OCP)
  • Liskov Substitution Principle (LSP)
  • Interface Segregation Principle (ISP)
  • Dependency Inversion Principle (DIP)

SOLID Principles This article will explain each principle, provide examples of how they can be broken, and show the correct implementation to fix them.


Single Responsibility Principle (SRP)​

Definition​

The Single Responsibility Principle states that a class should have only one reason to change, meaning it should have only one job or responsibility.

Broken Example​

class Employee {
private String name;
private double salary;

public Employee(String name, double salary) {
this.name = name;
this.salary = salary;
}

public void save() {
// Code to save employee data to the database
System.out.println("Employee saved to database: " + name);
}

public void calculateSalary() {
// Code to calculate salary
System.out.println("Salary calculated: " + salary);
}
}

Correct Example​

class Employee {
private String name;
private double salary;

public Employee(String name, double salary) {
this.name = name;
this.salary = salary;
}

public void calculateSalary() {
// Code to calculate salary
System.out.println("Salary calculated: " + salary);
}
}

class EmployeeRepository {
public void save(Employee employee) {
// Code to save employee data to the database
System.out.println("Employee saved to database: " + employee.getName());
}
}

Open/Closed Principle (OCP)​

Definition​

The Open/Closed Principle states that software entities (classes, modules, functions, etc.) should be open for extension but closed for modification.

Broken Example​

class Shape {
String type;

public Shape(String type) {
this.type = type;
}
}

class AreaCalculator {
public double calculateArea(Shape shape) {
if (shape.type.equals("circle")) {
// Calculate area for circle
return Math.PI * Math.pow(5, 2); // Assuming radius is 5
} else if (shape.type.equals("rectangle")) {
// Calculate area for rectangle
return 10 * 5; // Assuming width is 10 and height is 5
}
return 0;
}
}

Correct Example​

interface Shape {
double calculateArea();
}

class Circle implements Shape {
private double radius;

public Circle(double radius) {
this.radius = radius;
}

@Override
public double calculateArea() {
return Math.PI * Math.pow(radius, 2);
}
}

class Rectangle implements Shape {
private double width;
private double height;

public Rectangle(double width, double height) {
this.width = width;
this.height = height;
}

@Override
public double calculateArea() {
return width * height;
}
}

class AreaCalculator {
public double calculateArea(Shape shape) {
return shape.calculateArea();
}
}

Liskov Substitution Principle (LSP)​

Definition​

The Liskov Substitution Principle states that objects of a superclass should be replaceable with objects of a subclass without affecting the correctness of the program.

Broken Example​

class Bird {
public void fly() {
System.out.println("Flying...");
}
}

class Ostrich extends Bird {
@Override
public void fly() {
throw new UnsupportedOperationException("Ostriches cannot fly");
}
}

Correct Example​

class Bird {
public void eat() {
System.out.println("Eating...");
}
}

class FlyingBird extends Bird {
public void fly() {
System.out.println("Flying...");
}
}

class Ostrich extends Bird {
// Ostriches do not fly, so no fly method here
}

Interface Segregation Principle (ISP)​

Definition​

The Interface Segregation Principle states that clients should not be forced to depend on interfaces they do not use.

Broken Example​

interface Worker {
void work();
void eat();
}

class Robot implements Worker {
@Override
public void work() {
System.out.println("Robot working...");
}

@Override
public void eat() {
throw new UnsupportedOperationException("Robots do not eat");
}
}

Correct Example​

interface Workable {
void work();
}

interface Eatable {
void eat();
}

class Robot implements Workable {
@Override
public void work() {
System.out.println("Robot working...");
}
}

class Human implements Workable, Eatable {
@Override
public void work() {
System.out.println("Human working...");
}

@Override
public void eat() {
System.out.println("Human eating...");
}
}

Dependency Inversion Principle (DIP)​

Definition​

The Dependency Inversion Principle states that high-level modules should not depend on low-level modules. Both should depend on abstractions. Additionally, abstractions should not depend on details. Details should depend on abstractions.

Broken Example​

class LightBulb {
public void turnOn() {
System.out.println("LightBulb turned on");
}

public void turnOff() {
System.out.println("LightBulb turned off");
}
}

class Switch {
private LightBulb bulb;

public Switch() {
this.bulb = new LightBulb();
}

public void operate() {
if (isOn) {
bulb.turnOff();
isOn = false;
} else {
bulb.turnOn();
isOn = true;
}
}

private boolean isOn = false;
}

Explanation​

In the broken example, the Switch class directly depends on the LightBulb class. This creates a tight coupling between the Switch (high-level module) and the LightBulb (low-level module). Here’s why this violates the Dependency Inversion Principle:

  1. Direct Dependency: The Switch class directly creates an instance of LightBulb within its constructor. This means that the Switch class is tightly coupled to the LightBulb class. If you want to change the type of device that the Switch controls (e.g., a fan instead of a light bulb), you would need to modify the Switch class itself.

  2. Lack of Abstraction: There is no abstraction layer between the Switch and the LightBulb. The Switch class is directly aware of the implementation details of the LightBulb class. This makes the Switch class less flexible and harder to extend or modify.

  3. Rigidity: The Switch class is rigid because it can only operate on a LightBulb. If you want to add support for other devices (e.g., a Fan), you would need to create a new Switch class or modify the existing one, which is not ideal.

Why High-Level Module Depends on Low-Level Module​

  • Direct Instantiation: The Switch class directly instantiates the LightBulb class within its constructor. This means that the Switch class is directly dependent on the LightBulb class.
  • No Abstraction Layer: There is no interface or abstract class that both the Switch and LightBulb classes implement. This lack of abstraction means that the Switch class is tightly coupled to the specific implementation of the LightBulb class.

Correct Example​

To adhere to the Dependency Inversion Principle, we introduce an abstraction (an interface) that both the Switch and the LightBulb classes depend on.

interface Switchable {
void turnOn();
void turnOff();
}

class LightBulb implements Switchable {
@Override
public void turnOn() {
System.out.println("LightBulb turned on");
}

@Override
public void turnOff() {
System.out.println("LightBulb turned off");
}
}

class Switch {
private Switchable device;

public Switch(Switchable device) {
this.device = device;
}

public void operate() {
if (isOn) {
device.turnOff();
isOn = false;
} else {
device.turnOn();
isOn = true;
}
}

private boolean isOn = false;
}

Explanation of Correct Example​

  1. Abstraction Layer: The Switchable interface acts as an abstraction layer. Both the Switch and the LightBulb classes depend on this abstraction.
  2. Dependency Injection: The Switch class now takes a Switchable object as a parameter in its constructor. This allows the Switch class to operate on any device that implements the Switchable interface, not just a LightBulb.
  3. Flexibility: This design makes the Switch class flexible and easier to extend. You can now create other classes that implement the Switchable interface (e.g., Fan) and pass them to the Switch class without modifying the Switch class itself.

By adhering to the Dependency Inversion Principle, we ensure that high-level modules (like Switch) do not depend on low-level modules (like LightBulb). Instead, both depend on abstractions (like the Switchable interface), making the system more modular, flexible, and easier to maintain.


Conclusion​

The SOLID principles are fundamental to writing clean, maintainable, and scalable software. By adhering to these principles, developers can create code that is easier to understand, extend, and refactor. Each principle addresses a specific aspect of software design, and understanding how to apply them correctly can significantly improve the quality of your code.

References:​

https://blog.bytebytego.com/p/mastering-design-principles-solid

Troubleshooting High Currency Issues in Kubernetes - Continued

· 阅读需 4 分钟

Pod Restart CrashLoopBackOff Loop Due to High Concurrency (Continued)


Introduction​

Following the previous issue, the environment experienced another instance of Harbor and Calico pods restarting due to failed health checks. Additionally, using kubectl commands to enter the pods was extremely slow or timed out. This article continues the troubleshooting process to identify and resolve the root cause.


Problem Background​

After a period, the environment again faced issues with Harbor and Calico pods restarting due to failed health checks. Using kubectl commands to enter the pods was slow or timed out.

[root@node01 ~]# kubectl exec -it -n system node1-59c9475bc6-zkhq5 bash
^

Cause Analysis​

The root cause of the repeated restarts was previously identified as health check timeouts, with TCP connections stuck in the SYN_SENT phase.

[root@node01 ~]# netstat -anp | grep 23380
tcp 0 0 127.0.0.1:23380 0.0.0.0:* LISTEN 38914/kubelet
tcp 0 0 127.0.0.1:38983 127.0.0.1:23380 SYN_SENT -

Verification of Previous Fixes​

First, check if the previous kernel parameter adjustments are still in place.

[root@node01 ~]# cat /etc/sysctl.conf
net.ipv4.tcp_max_syn_backlog = 32768
net.core.somaxconn = 32768

Verify if the changes have taken effect.

[root@node01 ~]# ss -lnt
State Recv-Q Send-Q Local Address:Port Peer Address:Port
LISTEN 0 32768 127.0.0.1:23380 *:*

Despite the parameters being correctly set, the issue persisted.


Exploring Additional Causes​

Given the global impact of the issue, it was likely due to a system-level performance bottleneck. High business load affects CPU, memory, disk, and connection counts. Since the connections were long-lived, the file descriptor limit could be a factor.


Identifying File Descriptor Limits​

Check the number of open file descriptors.

[root@node01 ~]# lsof -p 45775 | wc -l
17974

[root@node01 ~]# lsof -p 45775 | grep "sock" | wc -l
12051

The process had over 10,000 open sockets, exceeding the default limit of 1024.

[root@node01 ~]# ulimit -n
1024

Despite exceeding the limit, the business pod did not report "too many open files" errors.

[root@node01 ~]# kubectl logs -n system node1-59c9475bc6-zkhq5
start config
...

Solution​

Temporarily increase the file descriptor limit.

[root@node01 ~]# ulimit -n 65535
[root@node01 ~]# ulimit -n
65535

After the adjustment, kubectl commands responded normally, and the SYN_SENT phase issue was resolved.

[root@node01 ~]# kubectl exec -it -n system node1-59c9475bc6-zkhq5 bash
[root@node1-59c9475bc6-zkhq5]# exit
[root@node01 ~]# kubectl exec -it -n system node1-59c9475bc6-zkhq5 bash
[root@node1-59c9475bc6-zkhq5]# exit
[root@node01 ~]# kubectl exec -it -n system node1-59c9475bc6-zkhq5 bash
[root@node1-59c9475bc6-zkhq5]# exit

[root@node01 ~]# netstat -anp | grep 23380
tcp 0 0 127.0.0.1:23380 0.0.0.0:* LISTEN 38914/kubelet
tcp 0 0 127.0.0.1:56369 127.0.0.1:23380 TIME_WAIT -
tcp 0 0 127.0.0.1:23380 127.0.0.1:57601 TIME_WAIT -
tcp 0 0 127.0.0.1:23380 127.0.0.1:57479 TIME_WAIT -

Conclusion​

This case study highlights the importance of considering system-level parameters, such as file descriptor limits, in high-concurrency scenarios. Adjusting these parameters can resolve performance bottlenecks and ensure stable operation of Kubernetes environments. For environments with high business load, it is strongly recommended to perform comprehensive operating system-level performance optimizations.

Troubleshooting High Currency Issues in Kubernetes

· 阅读需 5 分钟

Pod Restart CrashLoopBackOff Loop Due to High Concurrency


Introduction​

In a Kubernetes cluster environment, a business operation involving extensive configuration distribution (lasting several hours or more) led to repeated restarts of Calico pods. This article details the troubleshooting process, focusing on identifying the root cause and implementing a solution.


Problem Background​

During a high-concurrency operation, Calico pods in the Kubernetes cluster began to restart repeatedly.

[root@node02 ~]# kubectl get pod -n kube-system -owide | grep node01
calico-kube-controllers-6f59b8cdd8-8v2qw 1/1 Running 0 4h45m 10.10.119.238 node01 <none> <none>
calico-node-b8w2b 1/1 CrashLoopBackOff 43 3d19h 10.10.119.238 node01 <none> <none>
coredns-795cc9c45c-k7qpb 1/1 Running 0 4h45m 177.177.237.42 node01 <none> <none>
...

Analysis Process​

Upon observing the CrashLoopBackOff state of the pods, the first step was to use kubectl describe to gather more information.

[root@node02 ~]# kubectl describe pod -n kube-system calico-node-b8w2b
...
Events:
Type Reason Age From Message
---- ------ ---- ---- -------
Warning Unhealthy 58m (x111 over 3h12m) kubelet, node01 (combined from similar events): Liveness probe failed: Get http://localhost:9099/liveness: net/http: request canceled while waiting for connection (Client.Timeout exceeded while awaiting headers)
Normal Pulled 43m (x36 over 3d19h) kubelet, node01 Container image "calico/node:v3.15.1" already present on machine
Warning Unhealthy 8m16s (x499 over 3h43m) kubelet, node01 Liveness probe failed: Get http://localhost:9099/liveness: net/http: request canceled while waiting for connection (Client.Timeout exceeded while awaiting headers)
Warning BackOff 3m31s (x437 over 3h3m) kubelet, node01 Back-off restarting failed container

The events indicated that the liveness probe was failing due to a connection timeout.


Investigating the Issue​

Manual execution of the health check command revealed slow response times, which were significantly higher than the usual millisecond-level response.

[root@node01 ~]# time curl -i http://localhost:9099/liveness
HTTP/1.1 204 No Content
Date: Tue, 15 Jun 2021 06:24:35 GMT
real 0m1.012s
user 0m0.003s
sys 0m0.005s

Logs from Calico's bird, confd, and felix components did not show any apparent errors. Checking the port status indicated that it was listening correctly.

[root@node02 ~]# netstat -anp | grep 9099
tcp 0 0 127.0.0.1:9099 0.0.0.0:* LISTEN 1202/calico-node
tcp 0 0 127.0.0.1:9099 127.0.0.1:56728 TIME_WAIT -
tcp 0 0 127.0.0.1:56546 127.0.0.1:9099 TIME_WAIT -

TCP Connection Timeout​

Given the connection timeout error, the TCP connection state was observed.

[root@node01 ~]# netstat -na | awk '/^tcp/{s[$6]++}END{for(key in s) print key,s[key]}'
LISTEN 49
ESTABLISHED 284
SYN_SENT 4
TIME_WAIT 176

The top command showed that the business Java process was consuming high CPU, peaking at over 2000%.

[root@node01 ~]# top
top - 14:28:57 up 13 days, 27 min, 2 users, load average: 9.55, 9.93, 9.91
Tasks: 1149 total, 1 running, 1146 sleeping, 0 stopped, 2 zombie
%Cpu(s): 16.0 us, 2.9 sy, 0.0 ni, 80.9 id, 0.0 wa, 0.0 hi, 0.1 si, 0.0 st
KiB Mem : 15249982+total, 21419184 free, 55542588 used, 75538048 buff/cache
KiB Swap: 0 total, 0 free, 0 used. 94226176 avail Mem

PID USER PR NI VIRT RES SHR S %CPU %MEM TIME+ COMMAND
6754 root 20 0 66.8g 25.1g 290100 S 700.0 17.3 2971:49 java
25214 root 20 0 6309076 179992 37016 S 36.8 0.1 439:06.29 kubelet
20331 root 20 0 3196660 172364 24908 S 21.1 0.1 349:56.64 dockerd

Understanding CPU Load​

Checking the total number of CPU cores and comparing it with the load average and CPU usage indicated that the load was not excessively high.

[root@node01 ~]# cat /proc/cpuinfo | grep "physical id" | sort | uniq | wc -l
48
[root@node01 ~]# cat /proc/cpuinfo | grep "cpu cores" | uniq
cpu cores: 1

Given the high concurrency, the issue was likely related to the TCP connection setup. Understanding the TCP connection phases helped pinpoint the problem.


Kernel Parameter Tuning​

The issue was traced to the SYN_SENT phase of TCP connections. Adjusting kernel parameters related to TCP connections resolved the problem.

TCP State Transition Diagram​

graph TD
CLOSED -->|Client sends SYN| SYN_SENT
SYN_SENT -->|Server responds with SYN+ACK| SYN_RECV
SYN_RECV -->|Client sends ACK| ESTABLISHED
ESTABLISHED -->|Connection closed by either party| FIN_WAIT_1
FIN_WAIT_1 -->|ACK received| FIN_WAIT_2
FIN_WAIT_2 -->|FIN received| TIME_WAIT
TIME_WAIT -->|Timeout| CLOSED
FIN_WAIT_1 -->|FIN received| CLOSING
CLOSING -->|ACK received| TIME_WAIT
SYN_RECV -->|Server sends FIN| LAST_ACK
LAST_ACK -->|Client sends ACK| CLOSED

Adjusting Kernel Parameters​

[root@node01 ~]# cat /etc/sysctl.conf
...
net.ipv4.tcp_max_syn_backlog = 32768
net.core.somaxconn = 32768

[root@node01 ~]# sysctl -p
...
net.ipv4.tcp_max_syn_backlog = 32768
net.core.somaxconn = 32768

After applying these changes, the health check commands executed without delay, and the pods returned to normal.

[root@node01 ~]# time curl -i http://localhost:9099/liveness
HTTP/1.1 204 No Content
Date: Tue, 15 Jun 2021 14:48:38 GMT
real 0m0.011s
user 0m0.004s
sys 0m0.004s

Conclusion​

This case study highlights the importance of understanding and tuning kernel parameters in high-concurrency scenarios. By adjusting parameters related to TCP connection handling, the issue of repeated pod restarts due to high CPU load and connection timeouts was resolved. This approach can be applied to similar issues in Kubernetes environments to ensure stable and efficient operation.

Understanding Object Types in Application Development

· 阅读需 8 分钟

Introduction​

In application development, different types of objects serve various purposes. Understanding these objects and their roles is crucial for designing scalable and maintainable systems. This article will explain common object types such as Value Object (VO), Plain Old Java Object (POJO), Data Transfer Object (DTO), Entity, Model, Persistent Object (PO), Business Object (BO), and Data Access Object (DAO). We will also provide a textual diagram to illustrate the transition between these objects and sample code to demonstrate their usage.


Object Types​

Value Object (VO)​

A Value Object is an object that represents a simple entity whose equality is not based on identity but on the value of its properties. VOs are immutable and typically used to represent concepts that are naturally comparable by value.

Plain Old Java Object (POJO)​

A POJO is a simple Java object that does not require any specific framework or library. It is a plain Java object that follows basic Java conventions and does not extend or implement any special classes or interfaces.

Data Transfer Object (DTO)​

A DTO is an object used to transfer data between different layers of an application, such as between the service layer and the presentation layer. DTOs are typically simple objects that contain data but do not contain any business logic.

Entity​

An Entity is an object that represents a persistent domain object, typically mapped to a database table. Entities have a unique identity and are often used to represent business concepts.

Model​

A Model represents the data and business logic of an application. It encapsulates the state and behavior of the application's domain. Models are often used in the service layer to perform business operations.

Persistent Object (PO)​

A Persistent Object is an object that is mapped to a database table. It is similar to an Entity but is often used in older or specific frameworks where the term Entity is not used.

Business Object (BO)​

A Business Object encapsulates the business logic of an application. It is responsible for performing business operations and often interacts with DAOs to persist data.

Data Access Object (DAO)​

A DAO is an object that provides an abstract interface to some type of database or other persistence mechanism. It allows the application to access and manipulate data without exposing the underlying data source.


Transition Diagram​

graph TD
A[Entity] -->|Map to Database| B[Repository]
B -->|Fetch Data| C[Service Layer]
C -->|Transform| D[DTO]
D -->|Transfer Data| E[Controller]
E -->|Present Data| F[View]
C -->|Business Logic| G[Model]
G -->|Represent Value| H[Value Object]
C -->|Business Logic| I[Business Object]
I -->|Access Data| J[DAO]
J -->|Map to Database| K[Persistent Object]

Explanation​

  1. Entity: Represents a persistent domain object.
  2. Repository: Manages the persistence of entities.
  3. Service Layer: Contains business logic and transforms entities into DTOs.
  4. DTO: Transfers data between layers.
  5. Controller: Handles HTTP requests and responses.
  6. View: Presents data to the user.
  7. Model: Contains business logic and encapsulates state.
  8. Value Object: Represents a simple, immutable value.
  9. Business Object: Encapsulates business logic.
  10. DAO: Provides an abstract interface to the database.
  11. Persistent Object: Mapped to a database table.

Scenarios​

Value Object (VO)​

  • Scenario: Representing a monetary value or a date range.
  • Usage: Used in business logic to ensure immutability and value-based equality.

Plain Old Java Object (POJO)​

  • Scenario: Simple data structures without any framework dependencies.
  • Usage: Used in any layer of the application where a simple data structure is needed.

Data Transfer Object (DTO)​

  • Scenario: Transferring data between different layers of the application.
  • Usage: Used in the service layer to transfer data to the presentation layer.

Entity​

  • Scenario: Representing a persistent domain object.
  • Usage: Used in the persistence layer to map to database tables.

Model​

  • Scenario: Representing the business logic and state of the application.
  • Usage: Used in the service layer to perform business operations.

Persistent Object (PO)​

  • Scenario: Mapping to a database table in older or specific frameworks.
  • Usage: Used in the persistence layer to represent database records.

Business Object (BO)​

  • Scenario: Encapsulating business logic.
  • Usage: Used in the service layer to perform business operations.

Data Access Object (DAO)​

  • Scenario: Providing an abstract interface to the database.
  • Usage: Used in the persistence layer to access and manipulate data.

Sample Code​

Value Object (VO)​

public final class Money {
private final double amount;
private final String currency;

public Money(double amount, String currency) {
this.amount = amount;
this.currency = currency;
}

public double getAmount() {
return amount;
}

public String getCurrency() {
return currency;
}

@Override
public boolean equals(Object o) {
if (this == o) return true;
if (o == null || getClass() != o.getClass()) return false;
Money money = (Money) o;
return Double.compare(money.amount, amount) == 0 &&
currency.equals(money.currency);
}

@Override
public int hashCode() {
return Objects.hash(amount, currency);
}
}

Plain Old Java Object (POJO)​

public class User {
private String name;
private int age;

public String getName() {
return name;
}

public void setName(String name) {
this.name = name;
}

public int getAge() {
return age;
}

public void setAge(int age) {
this.age = age;
}
}

Data Transfer Object (DTO)​

public class UserDTO {
private String name;
private int age;

public String getName() {
return name;
}

public void setName(String name) {
this.name = name;
}

public int getAge() {
return age;
}

public void setAge(int age) {
this.age = age;
}
}

Entity​

@Entity
public class UserEntity {
@Id
@GeneratedValue(strategy = GenerationType.IDENTITY)
private Long id;
private String name;
private int age;

public Long getId() {
return id;
}

public void setId(Long id) {
this.id = id;
}

public String getName() {
return name;
}

public void setName(String name) {
this.name = name;
}

public int getAge() {
return age;
}

public void setAge(int age) {
this.age = age;
}
}

Model​

public class UserModel {
private String name;
private int age;

public String getName() {
return name;
}

public void setName(String name) {
this.name = name;
}

public int getAge() {
return age;
}

public void setAge(int age) {
this.age = age;
}

public void validateAge() {
if (age < 0) {
throw new IllegalArgumentException("Age cannot be negative");
}
}
}

Persistent Object (PO)​

public class UserPO {
private Long id;
private String name;
private int age;

public Long getId() {
return id;
}

public void setId(Long id) {
this.id = id;
}

public String getName() {
return name;
}

public void setName(String name) {
this.name = name;
}

public int getAge() {
return age;
}

public void setAge(int age) {
this.age = age;
}
}

Business Object (BO)​

public class UserBO {
private UserDAO userDAO;

public UserBO(UserDAO userDAO) {
this.userDAO = userDAO;
}

public UserDTO getUserById(Long id) {
UserPO userPO = userDAO.findById(id);
UserDTO userDTO = new UserDTO();
userDTO.setName(userPO.getName());
userDTO.setAge(userPO.getAge());
return userDTO;
}

public void createUser(UserDTO userDTO) {
UserPO userPO = new UserPO();
userPO.setName(userDTO.getName());
userPO.setAge(userDTO.getAge());
userDAO.save(userPO);
}
}

Data Access Object (DAO)​

public interface UserDAO {
UserPO findById(Long id);
void save(UserPO userPO);
}

public class UserDAOImpl implements UserDAO {
@Override
public UserPO findById(Long id) {
// Implementation to fetch user from database
return new UserPO();
}

@Override
public void save(UserPO userPO) {
// Implementation to save user to database
}
}

Transition Example​

public class UserService {
private UserBO userBO;

public UserService(UserBO userBO) {
this.userBO = userBO;
}

public UserDTO getUserById(Long id) {
return userBO.getUserById(id);
}

public void createUser(UserDTO userDTO) {
userBO.createUser(userDTO);
}
}

Conclusion​

Understanding the different types of objects in application development is crucial for designing robust and maintainable systems. Each object type serves a specific purpose and is used in different scenarios. By following best practices and adhering to design principles, developers can create applications that are easier to extend, test, and maintain.

Deep Dive: Comparing Spring REST Clients with Spring Cloud OpenFeign

· 阅读需 5 分钟
  1. Introduction
  2. Overview of Spring REST Clients
  3. Overview of Spring Cloud OpenFeign
  4. Key Differences
  5. Why Spring REST Clients are Replacing OpenFeign
  6. Sample Code Comparison
  7. Conclusion

Introduction​

In the realm of microservices and RESTful APIs, efficient and maintainable client-side HTTP communication is crucial. Spring provides two prominent solutions for this: Spring REST Clients and Spring Cloud OpenFeign. This article delves into a detailed comparison of these two approaches, highlighting their key differences and discussing why Spring REST Clients are increasingly replacing OpenFeign in modern applications.

Overview of Spring REST Clients​

What is Spring REST Clients?​

Spring REST Clients, introduced in Spring 5, is a set of tools and libraries that facilitate HTTP client-side communication. It includes RestTemplate and WebClient, both of which are designed to simplify the process of making HTTP requests and handling responses.

Key Features​

  • RestTemplate: A synchronous client that provides a simple, template method API over underlying HTTP client libraries.
  • WebClient: A reactive, non-blocking client introduced in Spring 5, suitable for modern, asynchronous applications.
  • Integration with Spring WebFlux: WebClient is part of the Spring WebFlux framework, making it ideal for reactive programming.
  • Flexibility: Supports both synchronous and asynchronous operations.

Overview of Spring Cloud OpenFeign​

What is Spring Cloud OpenFeign?​

Spring Cloud OpenFeign is a declarative HTTP client that simplifies the process of consuming RESTful services. It allows you to define interfaces with annotations to describe the REST API you want to consume, handling the HTTP requests and responses automatically.

Key Features​

  • Declarative REST Client: Define interfaces with annotations to describe the REST API.
  • Integration with Spring Boot: Automatically integrates with Spring Boot's dependency injection and configuration mechanisms.
  • Load Balancing: Integrates with Spring Cloud LoadBalancer for client-side load balancing.
  • Error Handling: Provides mechanisms to handle errors and exceptions gracefully.
  • Interceptors: Allows adding custom interceptors to modify requests and responses.

Key Differences​

1. Programming Model​

  • Spring REST Clients: Offers both synchronous (RestTemplate) and reactive (WebClient) models, providing flexibility based on the application's needs.
  • OpenFeign: Primarily declarative, focusing on defining interfaces with annotations for HTTP communication.

2. Reactive Support​

  • Spring REST Clients: WebClient provides full support for reactive programming, making it suitable for modern, asynchronous applications.
  • OpenFeign: Limited reactive support; primarily designed for synchronous communication.

3. Integration and Ecosystem​

  • Spring REST Clients: Deeply integrated with the Spring ecosystem, including Spring WebFlux and Spring Boot.
  • OpenFeign: Integrates well with Spring Cloud, providing additional features like load balancing and service discovery.

4. Error Handling and Customization​

  • Spring REST Clients: Provides robust error handling and customization options through exception handling and interceptors.
  • OpenFeign: Offers error handling through custom error decoders and interceptors, but with a more declarative approach.

Why Spring REST Clients are Replacing OpenFeign​

1. Reactive Programming​

With the rise of reactive programming and the need for non-blocking, asynchronous communication, WebClient has become the preferred choice over RestTemplate and OpenFeign. WebClient's reactive nature aligns well with modern application architectures.

2. Flexibility and Control​

Spring REST Clients provide more flexibility and control over HTTP communication. Developers can choose between synchronous and asynchronous models based on their specific requirements, whereas OpenFeign is more opinionated and less flexible.

3. Ecosystem Integration​

Spring REST Clients are deeply integrated with the broader Spring ecosystem, including Spring WebFlux and Spring Boot. This integration provides a seamless development experience and leverages the full capabilities of the Spring framework.

4. Community and Support​

As part of the core Spring framework, Spring REST Clients benefit from continuous updates, improvements, and community support. OpenFeign, while powerful, is part of the Spring Cloud ecosystem and may not receive the same level of attention and updates.

Sample Code Comparison​

Using Spring REST Clients (WebClient)​

import org.springframework.web.reactive.function.client.WebClient;
import reactor.core.publisher.Mono;

public class ProductServiceClient {

private final WebClient webClient;

public ProductServiceClient(WebClient.Builder webClientBuilder) {
this.webClient = webClientBuilder.baseUrl("http://localhost:8081").build();
}

public Mono<Product> getProduct(Long productId) {
return webClient.get()
.uri("/products/{productId}", productId)
.retrieve()
.bodyToMono(Product.class);
}
}

Using Spring Cloud OpenFeign​

import org.springframework.cloud.openfeign.FeignClient;
import org.springframework.web.bind.annotation.GetMapping;
import org.springframework.web.bind.annotation.PathVariable;

@FeignClient(name = "product-service", url = "http://localhost:8081")
public interface ProductServiceClient {

@GetMapping("/products/{productId}")
Product getProduct(@PathVariable("productId") Long productId);
}

Conclusion​

While Spring Cloud OpenFeign offers a declarative and simplified approach to HTTP client communication, Spring REST Clients provide more flexibility, reactive support, and deep integration with the Spring ecosystem. As modern applications increasingly adopt reactive programming and require more control over HTTP communication, Spring REST Clients, particularly WebClient, are becoming the preferred choice over OpenFeign. By understanding the key differences and advantages of each approach, developers can make informed decisions to build robust and scalable microservices architectures.

Reference​

https://spring.io/projects/spring-cloud-openfeign Warning: As announced in Spring Cloud 2022.0.0 release blog entry, Spring Cloud OpenFeign is now considered feature-complete. We will only be focusing on bug fixes and potentially merging small community feature pull requests. We recommend migrating to Spring Interface Clients instead.

Deep Dive into Spring Cloud OpenFeign --- Deprecated

· 阅读需 4 分钟
  1. Introduction
  2. Key Features
  3. Getting Started
  4. Real Production Use Case
  5. Sample Code
  6. Deployment and Usage
  7. Conclusion

Deep Dive into Spring Cloud OpenFeign


Introduction​

Spring Cloud OpenFeign is a declarative HTTP client that simplifies the process of consuming RESTful services in Spring Boot applications. It integrates seamlessly with Spring's dependency injection and configuration mechanisms, making it a powerful tool for microservices architectures. This article provides a deep dive into Spring Cloud OpenFeign, including a real production use case, sample code, and deployment strategies.

Key Features​

  • Declarative REST Client: Define interfaces with annotations to describe the REST API you want to consume.
  • Integration with Spring Boot: Automatically integrates with Spring Boot's dependency injection and configuration mechanisms.
  • Load Balancing: Integrates with Spring Cloud LoadBalancer for client-side load balancing.
  • Error Handling: Provides mechanisms to handle errors and exceptions gracefully.
  • Interceptors: Allows adding custom interceptors to modify requests and responses.

Getting Started​

To use Spring Cloud OpenFeign in your Spring Boot project, add the following dependency to your pom.xml (for Maven) or build.gradle (for Gradle):

Maven:

<dependency>
<groupId>org.springframework.cloud</groupId>
<artifactId>spring-cloud-starter-openfeign</artifactId>
</dependency>

Gradle:

implementation 'org.springframework.cloud:spring-cloud-starter-openfeign'

Enable Feign in your Spring Boot application by adding the @EnableFeignClients annotation to your main application class:

import org.springframework.cloud.openfeign.EnableFeignClients;
import org.springframework.boot.SpringApplication;
import org.springframework.boot.autoconfigure.SpringBootApplication;

@SpringBootApplication
@EnableFeignClients
public class MyApplication {
public static void main(String[] args) {
SpringApplication.run(MyApplication.class, args);
}
}

Real Production Use Case​

Scenario: Microservices Communication in an E-commerce Platform​

In an e-commerce platform, multiple microservices interact to handle various functionalities such as product catalog, user management, and order processing. OpenFeign is used to facilitate communication between these services.

Example: Order Service Communicating with Product Service​

The Order Service needs to retrieve product details from the Product Service to process orders. OpenFeign simplifies this communication by allowing the Order Service to define a Feign client for the Product Service.

Sample Code​

Define the Feign Client​

import org.springframework.cloud.openfeign.FeignClient;
import org.springframework.web.bind.annotation.GetMapping;
import org.springframework.web.bind.annotation.PathVariable;

@FeignClient(name = "product-service", url = "http://localhost:8081")
public interface ProductServiceClient {

@GetMapping("/products/{productId}")
Product getProduct(@PathVariable("productId") Long productId);
}

Product Class​

public class Product {
private Long id;
private String name;
private Double price;

// Getters and Setters
}

Using the Feign Client in the Order Service​

import org.springframework.beans.factory.annotation.Autowired;
import org.springframework.stereotype.Service;

@Service
public class OrderService {

@Autowired
private ProductServiceClient productServiceClient;

public void processOrder(Long productId) {
Product product = productServiceClient.getProduct(productId);
// Process the order using the product details
}
}

Deployment and Usage​

Deployment Strategy​

  1. Containerization: Use Docker to containerize your Spring Boot applications.
  2. Orchestration: Deploy your containers using Kubernetes for orchestration.
  3. Service Discovery: Integrate with a service discovery tool like Eureka or Consul.

Example Deployment with Kubernetes​

Dockerfile​

FROM openjdk:11-jre-slim
COPY target/myapp.jar /myapp.jar
ENTRYPOINT ["java", "-jar", "/myapp.jar"]

Kubernetes Deployment YAML​

apiVersion: apps/v1
kind: Deployment
metadata:
name: order-service
spec:
replicas: 3
selector:
matchLabels:
app: order-service
template:
metadata:
labels:
app: order-service
spec:
containers:
- name: order-service
image: myapp:latest
ports:
- containerPort: 8080

Usage in Production​

  1. Monitoring: Use tools like Prometheus and Grafana to monitor your services.
  2. Logging: Implement centralized logging with ELK (Elasticsearch, Logstash, Kibana) stack.
  3. Security: Ensure secure communication using HTTPS and OAuth2 for authentication.

Conclusion​

Spring Cloud OpenFeign is a powerful tool for building declarative HTTP clients in Spring Boot applications. Its integration with the Spring ecosystem, combined with active development and community support, makes it a reliable choice for microservices architectures. By following the steps outlined in this article, you can effectively use OpenFeign in your production environment, facilitating seamless communication between microservices.

Deep Dive into java.util.function Package

· 阅读需 7 分钟

Deep Dive into java.util.function Package


Introduction​

The java.util.function package in Java provides a set of functional interfaces that are used to represent various types of lambda expressions and method references. These interfaces are essential for writing concise and expressive code, especially when working with streams, collections, and other functional programming constructs in Java.

This article will deep dive into the key functional interfaces provided by the java.util.function package, discuss important points and techniques, provide best practices, and present real-life use cases with sample code.

Key Functional Interfaces​

The java.util.function package includes several functional interfaces, each designed to represent a specific type of lambda expression. Here are the most commonly used ones:

Function​

The Function<T, R> interface represents a function that takes an argument of type T and returns a result of type R.

import java.util.function.Function;

public class FunctionExample {
public static void main(String[] args) {
Function<String, Integer> stringLength = s -> s.length();
System.out.println(stringLength.apply("Hello, World!")); // Output: 13
}
}

Consumer​

The Consumer<T> interface represents an operation that takes an argument of type T and returns no result. It is typically used for side effects.

import java.util.function.Consumer;

public class ConsumerExample {
public static void main(String[] args) {
Consumer<String> printUpperCase = s -> System.out.println(s.toUpperCase());
printUpperCase.accept("hello"); // Output: HELLO
}
}

Supplier​

The Supplier<T> interface represents a supplier of results. It takes no arguments and returns a result of type T.

import java.util.function.Supplier;

public class SupplierExample {
public static void main(String[] args) {
Supplier<String> randomString = () -> "Random String";
System.out.println(randomString.get()); // Output: Random String
}
}

Predicate​

The Predicate<T> interface represents a predicate (boolean-valued function) of one argument. It returns true or false based on the input.

import java.util.function.Predicate;

public class PredicateExample {
public static void main(String[] args) {
Predicate<Integer> isEven = n -> n % 2 == 0;
System.out.println(isEven.test(4)); // Output: true
}
}

BiFunction​

The BiFunction<T, U, R> interface represents a function that takes two arguments of types T and U and returns a result of type R.

import java.util.function.BiFunction;

public class BiFunctionExample {
public static void main(String[] args) {
BiFunction<Integer, Integer, Integer> add = (a, b) -> a + b;
System.out.println(add.apply(3, 5)); // Output: 8
}
}

BiConsumer​

The BiConsumer<T, U> interface represents an operation that takes two arguments of types T and U and returns no result.

import java.util.function.BiConsumer;

public class BiConsumerExample {
public static void main(String[] args) {
BiConsumer<String, Integer> printKeyValue = (k, v) -> System.out.println(k + ": " + v);
printKeyValue.accept("Age", 30); // Output: Age: 30
}
}

BiPredicate​

The BiPredicate<T, U> interface represents a predicate (boolean-valued function) of two arguments.

import java.util.function.BiPredicate;

public class BiPredicateExample {
public static void main(String[] args) {
BiPredicate<String, String> isSameLength = (s1, s2) -> s1.length() == s2.length();
System.out.println(isSameLength.test("hello", "world")); // Output: true
}
}

UnaryOperator​

The UnaryOperator<T> interface represents an operation on a single operand that produces a result of the same type as its operand.

import java.util.function.UnaryOperator;

public class UnaryOperatorExample {
public static void main(String[] args) {
UnaryOperator<Integer> square = n -> n * n;
System.out.println(square.apply(5)); // Output: 25
}
}

BinaryOperator​

The BinaryOperator<T> interface represents an operation upon two operands of the same type, producing a result of the same type as the operands.

import java.util.function.BinaryOperator;

public class BinaryOperatorExample {
public static void main(String[] args) {
BinaryOperator<Integer> multiply = (a, b) -> a * b;
System.out.println(multiply.apply(3, 4)); // Output: 12
}
}

Best Practices​

  1. Use Functional Interfaces Appropriately: Choose the right functional interface based on the number of arguments and the return type.
  2. Leverage Method References: Use method references where possible to make the code more concise and readable.
  3. Avoid Overusing Lambdas: While lambdas are powerful, overusing them can make the code harder to read and maintain.
  4. Combine Functional Interfaces: Use the andThen, compose, and and methods to combine multiple functional interfaces.
  5. Use Default Methods: Take advantage of default methods provided by functional interfaces to create more complex behaviors.

Real-Life Use Cases​

Use Case 1: Data Transformation​

In data processing applications, Function and UnaryOperator can be used to transform data from one format to another.

import java.util.Arrays;
import java.util.List;
import java.util.function.Function;
import java.util.stream.Collectors;

public class DataTransformationExample {
public static void main(String[] args) {
List<String> names = Arrays.asList("Alice", "Bob", "Charlie");
Function<String, String> toUpperCase = String::toUpperCase;
List<String> upperCaseNames = names.stream()
.map(toUpperCase)
.collect(Collectors.toList());
System.out.println(upperCaseNames); // Output: [ALICE, BOB, CHARLIE]
}
}

Use Case 2: Event Handling​

In event-driven applications, Consumer can be used to handle events and perform side effects.

import java.util.function.Consumer;

public class EventHandlingExample {
public static void main(String[] args) {
Consumer<String> onEvent = s -> System.out.println("Event received: " + s);
onEvent.accept("Button Clicked"); // Output: Event received: Button Clicked
}
}

Use Case 3: Validation​

In validation scenarios, Predicate can be used to check conditions and return a boolean result.

import java.util.function.Predicate;

public class ValidationExample {
public static void main(String[] args) {
Predicate<String> isValidEmail = s -> s.contains("@") && s.contains(".");
System.out.println(isValidEmail.test("test@example.com")); // Output: true
}
}

Sample Code​

Function​

import java.util.function.Function;

public class FunctionExample {
public static void main(String[] args) {
Function<String, Integer> stringLength = s -> s.length();
System.out.println(stringLength.apply("Hello, World!")); // Output: 13
}
}

Consumer​

import java.util.function.Consumer;

public class ConsumerExample {
public static void main(String[] args) {
Consumer<String> printUpperCase = s -> System.out.println(s.toUpperCase());
printUpperCase.accept("hello"); // Output: HELLO
}
}

Supplier​

import java.util.function.Supplier;

public class SupplierExample {
public static void main(String[] args) {
Supplier<String> randomString = () -> "Random String";
System.out.println(randomString.get()); // Output: Random String
}
}

Predicate​

import java.util.function.Predicate;

public class PredicateExample {
public static void main(String[] args) {
Predicate<Integer> isEven = n -> n % 2 == 0;
System.out.println(isEven.test(4)); // Output: true
}
}

BiFunction​

import java.util.function.BiFunction;

public class BiFunctionExample {
public static void main(String[] args) {
BiFunction<Integer, Integer, Integer> add = (a, b) -> a + b;
System.out.println(add.apply(3, 5)); // Output: 8
}
}

BiConsumer​

import java.util.function.BiConsumer;

public class BiConsumerExample {
public static void main(String[] args) {
BiConsumer<String, Integer> printKeyValue = (k, v) -> System.out.println(k + ": " + v);
printKeyValue.accept("Age", 30); // Output: Age: 30
}
}

BiPredicate​

import java.util.function.BiPredicate;

public class BiPredicateExample {
public static void main(String[] args) {
BiPredicate<String, String> isSameLength = (s1, s2) -> s1.length() == s2.length();
System.out.println(isSameLength.test("hello", "world")); // Output: true
}
}

UnaryOperator​

import java.util.function.UnaryOperator;

public class UnaryOperatorExample {
public static void main(String[] args) {
UnaryOperator<Integer> square = n -> n * n;
System.out.println(square.apply(5)); // Output: 25
}
}

BinaryOperator​

import java.util.function.BinaryOperator;

public class BinaryOperatorExample {
public static void main(String[] args) {
BinaryOperator<Integer> multiply = (a, b) -> a * b;
System.out.println(multiply.apply(3, 4)); // Output: 12
}
}

Conclusion​

The java.util.function package provides a rich set of functional interfaces that are essential for writing modern, concise, and expressive Java code. By understanding and leveraging these interfaces, you can significantly improve the readability and maintainability of your code. Real-life use cases and sample code demonstrate how these interfaces can be applied in various scenarios, making them indispensable tools for Java developers.